You’ve finished your glorious work at the printing press; surely it’s time for tea, buns and a rest? I’m sorry to say there’s more work to do. We’ll look here at the major steps that will assure you a tidy and clean print shop and an easier life. Remember that the sooner you clean after printing finishes, the quicker the job is! This guide covers hand-powered presses only: more industrial presses have almost-automatic cleaning mechanisms.
Printed Sheets
You first need to make sure your printed sheets are safe. You need to be away from the press (so as not to suffer accidental spills from cleaning); free from disturbance (so as not to cause set-off on the backs of sheets); and perhaps somewhere that is not cold so that drying is not inhibited.
Cleaning Equipment
At the least you’ll need a solvent and rags. While there might still be specialist cleaning products, I’ve been using white spirit or lighter fluid. Lighter fluid is especially useful for smaller presses where the nozzle can be used to good effect. Follow any safety instructions that come with the product. I know some printers use vegetable oil to act as a vehicle for ink, making it easier to clean a press. My experience is limited in this area but I found it left a difficult residue on rollers.
On rags, cotton is really the most useful material as it is absorbent. Be sure to buy rags that have all buttons, zips etc. removed and that have been washed a number of times so lint has been removed.
Also useful would be brushes of various sizes: from toothbrush size to shoe brush size but take care to make sure the bristles aren’t so stiff that they might damage the type.
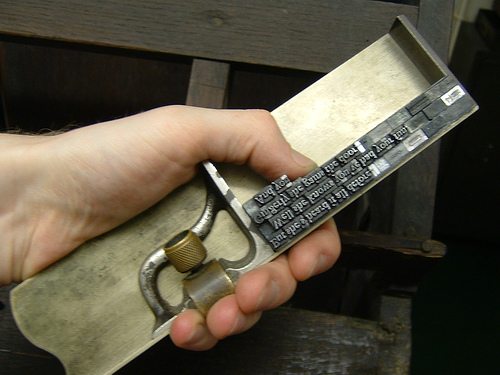
Cleaning the Forme
You need to first clean the forme. Remove the chase from the press and set it down on a solid surface. Using a solvent dampen a rag and wipe it over the surface of the type taking as much ink as possible away. Use a clean, dry cloth to wipe away any excess. If you splash the solvent around and then wipe, the inky solvent has a tendency to get between furniture and type and lead to dirt and so inaccuracy.
For dried-on ink, apply the solvent to a brush and then brush lightly on the type. Allow this to sink in and wipe away with a cloth. Repeat this process as needed until the ink is cleared.
Once clean you need to decide on the next step: further printing of the same forme will demand that you store the whole thing on a chase rack, or even back on the clean press. You might keep that job by removing the furniture and chase and storing the type on a galley. Otherwise you’ll have to take the type out and distribute it back in the case.
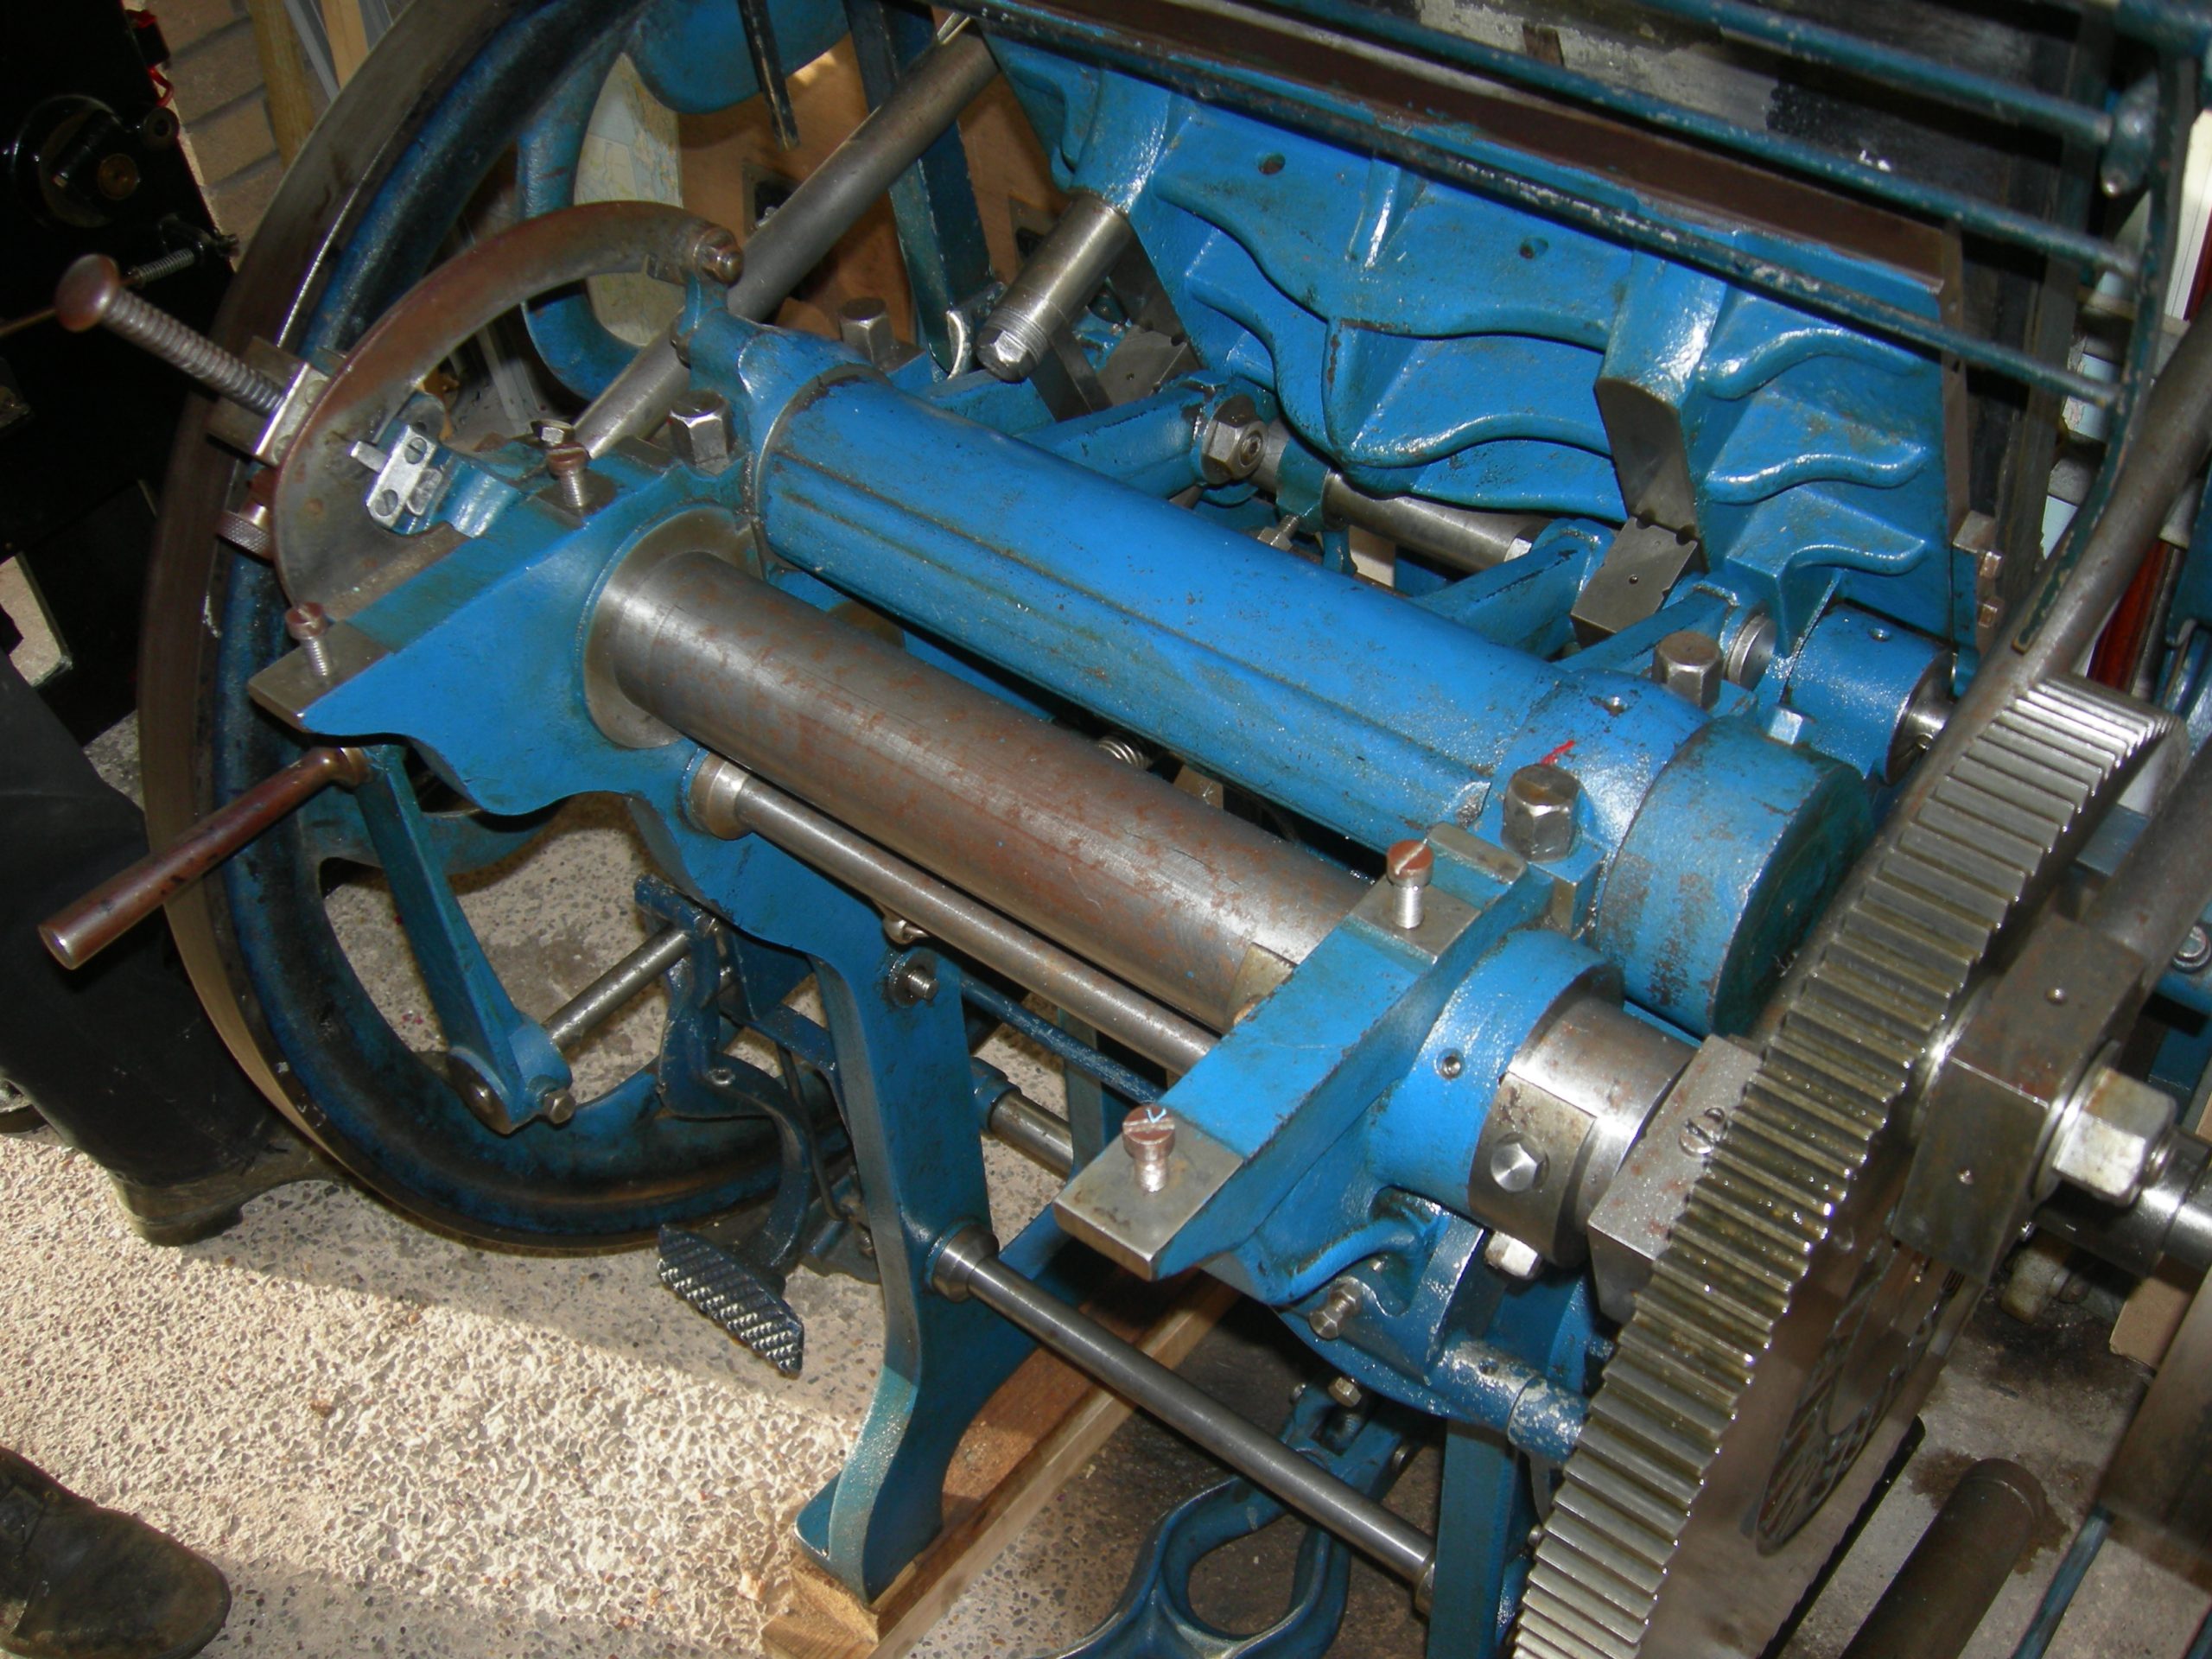
Cleaning the Press
Known also as washing-up, this process is crucial to the quality of your next print run. It’s especially important when changing colours or working in white or metallic inks. Very high quality printers demand that the press is cleaned, worked in white ink, and cleaned again when changing from a dark to a light colour.
Use as dirty a rag as possible and dampen it with the solvent, making the rag wet but not so much that solvent is dripping from it. With the rollers clear of the ink disk or drum, wipe this up first: folding and re-folding the rag and also advancing the disk or drum so that all areas are covered.
Turning your attention to the rollers, advance the press until the first roller touches the inking disk or drum. Re-folding the rag rub this across the length of the roller. Advance the press gradually to expose the other areas of the rollers and continue the process. Do this for each roller.
At this point you should have removed the bulk of the ink from the press and rollers. Start now with a cleaner rag and repeat the process until the press is clear of ink.
Finally
Your press will always repay being looked after. Take this opportunity to clean the other parts of the press with a lightly oiled rag; remember that she might also need a little oiling here and there. Finally you might cover your press up: Adana machines came with a plastic cover. Your press will look like new next time you start work.
Now have a cup of tea and a bun.